

Mortal Kombat X
Fatalities and Brutalities for PlayStation 4
Choose Your Character


Mortal Kombat X Finishers
The following directions assume that your character is facing right
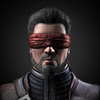
Cassie Cage
Fatality 1: Bubble Head (Mid)


Fatality 2: Selfie (Close)

Stage Fatality (Close)

Brutality 1: Pop Goes

· Only in Hollywood Variation
· Cassie must hit the opponent with 4 Nut Krackers during the match
· Final hit must come from Nut Kracker
· Cassie must hit the opponent with 4 Nut Krackers
during the match· Final hit must come from Nut Kracker
Brutality 2: Beatdown
· Only in Brawler Variation
· Final hit must come from a 3 hit kombo that ends with the Take Down
· Final hit must come from a 3 hit kombo that ends with the Take Down
Brutality 3: Half Day?


· Only in Spec Ops Variation
· Cassie must perform 1 American Ways during the match
· Must be Jump Distance away from the opponent.
· Final hit must come from Target Paint
· Cassie must perform 1 American Ways
during the match· Must be Jump Distance away from the opponent.
· Final hit must come from Target Paint
Brutality 4: Hats Off

· Available in all Variations
· Cassie must not lose a round
· Hold before the third hit of Kick Abuse
· Final hit must come from Kick Abuse
· Cassie must not lose a round
· Hold
before the third hit of Kick Abuse· Final hit must come from Kick Abuse
Brutality 5: Between The Eyes
· Available in all Variations
· Must be Jump Distance away from the opponent
· Final hit must come from Single Shot
· Must be Jump Distance away from the opponent
· Final hit must come from Single Shot
Brutality 6: Eye Popper
· Only in Hollywood Variation
· Cassie must hit the opponent with at least 6 Nut Krackers during the match
· Final hit must come from Nut Buster
· Cassie must hit the opponent with at least 6 Nut Krackers
during the match· Final hit must come from Nut Buster
Brutality 7: Hidden Brutality
· Only available in Spec Ops Variation
· Player must get first hit
· Player must perform connect 1 American Way during the match
· Final hit must come from The American Way
· Player must get first hit
· Player must perform connect 1 American Way
during the match· Final hit must come from The American Way
DVorah
Fatality 1: Bug Me (Mid)
Fatality 2: Heart Broken (Close)
Stage Fatality (Close)
Brutality 1: Incubate
 or
or · Only in Brood Mother Variation
· D'Vorah must connect 3 Krawler attacks
· Final hit must come from her throw or
· D'Vorah must connect 3 Krawler attacks
· Final hit must come from her throw
or Brutality 2: Bug Zapper
· Only in Swarm Queen Variation
· D'Vorah must stun her opponent with the Bug Bomb
· Must be Full Screen distance away from opponent
· Final hit must come from Infestation
· D'Vorah must stun her opponent with the Bug Bomb
· Must be Full Screen distance away from opponent
· Final hit must come from Infestation
Brutality 3: Acid Burn
· Only in Venomous Variation
· D'Vorah must hit with all 6 hits of Bug Spray
· Final hit must come from Bug Spray
· D'Vorah must hit with all 6 hits of Bug Spray
· Final hit must come from Bug Spray
Brutality 4: Fly Swatter
(Air) ,
,· Available in all Variations
· Perform a 4 hit kombo that ends with the Backward Air Throw (Air),
· Final hit must come from the Backward Air Throw (Air),
· Perform a 4 hit kombo that ends with the Backward Air Throw (Air)
,· Final hit must come from the Backward Air Throw (Air)
,Brutality 5: Migraine
· Available in all Variations
· D'Vorah must have over 50% health remaining
· Player must hold during the final hit
· Final hit must come from Ovipositor Charge
· D'Vorah must have over 50% health remaining
· Player must hold
during the final hit· Final hit must come from Ovipositor Charge
Ermac
Fatality 1: Inner Workings (Mid)
Fatality 2: Head Out (Mid)
Stage Fatality (Close)
Brutality 1: Gluttony
· Only in Mystic Variation
· Ermac must have less than 40% health remaining
· Final hit must come from Tele-Hold
· Ermac must have less than 40% health remaining
· Final hit must come from Tele-Hold
Brutality 2: Soul Eater
· Only in Master of Souls Variation
· Must land a 10 hit kombo during the match
· Must have 3 souls active and perform Soul Ball
· Final hit must come from a Soul Release
· Must land a 10 hit kombo during the match
· Must have 3 souls active and perform Soul Ball
· Final hit must come from a Soul Release
Brutality 3: Controlled Chaos
· Only in Spectral Variation
· Ermac must be in flight with Soul Accession
· Final hit must come from a Soul Charge during Soul Accession
· Ermac must be in flight with Soul Accession
· Final hit must come from a Soul Charge
during Soul AccessionBrutality 4: We Win
· Available in all Variations
· Must perform a 5 hit kombo that ends with Force Lift
· Final hit must come from a Force Lift
· Must perform a 5 hit kombo that ends with Force Lift
· Final hit must come from a Force Lift
Brutality 5: Nether Force
(Air)
· Available in all Variations
· Must perform 10 Special Attacks during the match
· Final hit must come from an Air Force Port (Air)
· Must perform 10 Special Attacks during the match
· Final hit must come from an Air Force Port (Air)
Erron Black
Fatality 1: Sand Storm (Mid)
Fatality 2: Six-Shooter (Far)
Stage Fatality (Close)
Brutality 1: Quick Draw
,· Only in Gunslinger Variation
· Must perform 10 back dashes
· Must be Sweep Distance away from the opponent
· Must be in Stand Off Stance during final hit
· Final hit must come from Spin Shot while in Stand Off Stance
· Must perform 10 back dashes
· Must be Sweep Distance away from the opponent
· Must be in Stand Off Stance
during final hit· Final hit must come from Spin Shot
while in Stand Off StanceBrutality 2: Sword In The Stone
· Only in Outlaw Variation
· Player must press during final hit
· Final hit must come from Tarkatan Infection
· Player must press
during final hit· Final hit must come from Tarkatan Infection
Brutality 3: Swing Low
· Only in Marksman Variation
· Must have 2 bars of super meter during final hit
· Final hit must come from Swing Shot
· Must have 2 bars of super meter during final hit
· Final hit must come from Swing Shot
Brutality 4: Serenity
· Available in all Variations
· Player must press or 15 times during final hit
· Final hit must come from Sand Trap or Quick Sand
· Player must press
or 15 times during final hit· Final hit must come from Sand Trap
or Quick Sand Brutality 5: Tunnel Vision
or · Available in all Variations
· Player must Hold during final hit
· Final hit must come from a throw or
· Player must Hold
during final hit· Final hit must come from a throw
or Brutality 6: Hidden Brutality

· Available in all variations
· Player must perform Sand Trap 4 times during the match
· Final hit must come from Trick Shot
· Player must perform Sand Trap 4
times during the match· Final hit must come from Trick Shot
Ferra Torr
Better Than One (Close)
Play Time (Mid)
Stage Fatality (Close)
Brutality 1: Stabby Stab
· Only in Ruthless Variation
· Ferra/Torr must be buffed from Pain And Gain
· Final hit must come from Grab 'n' Stab
· Ferra/Torr must be buffed from Pain And Gain
· Final hit must come from Grab 'n' Stab
Brutality 2: Twisted
· Only in Vicious Variation
· Must use 3 Level Interactions
· Player must press any attack button 5 times during the final hit
· Final hit must come from Deep Stab
· Must use 3 Level Interactions
· Player must press any attack button 5 times during the final hit
· Final hit must come from Deep Stab
Brutality 3: Steam Roller
· Only in Lackey Variation
· Ferra/Torr must hit the opponent with 3 Boulder Rolls during the match
· Final hit must come from Double Boulder Roll
· Ferra/Torr must hit the opponent with 3 Boulder Rolls
during the match· Final hit must come from Double Boulder Roll
Brutality 4: Play Thing
· Available in all Variations
· Must perform a 2 hit kombo with Kaber Toss as the final hit
· Final hit must come Kaber Toss
· Must perform a 2 hit kombo with Kaber Toss
as the final hit· Final hit must come Kaber Toss
Brutality 5: Trample
· Available in all Variations
· Must run 3 times during the match
· Player must hold during final hit
· Final hit must come from Tuck 'n' Charge
· Must run 3 times during the match
· Player must hold
during final hit· Final hit must come from Tuck 'n' Charge
Brutality 6: Step On Down
,· Only in Lackey Variation
· Ferra/Torr must have under 35% health remaining
· Final hit must come from Step Aside kombo,
· Ferra/Torr must have under 35% health remaining
· Final hit must come from Step Aside kombo
,Jacqui
Fatality 1: Blown Out (Close)
Fatality 2: Fist Pump (Close)
Stage Fatality (Close)
Brutality 1: Shrapnel
· Only in Shotgun Variation
· Must use 1 level Interactions during the match
· Must be Sweep Distance away from the opponent
· Final hit must come from a Low Blow or Low Blast
· Must use 1 level Interactions during the match
· Must be Sweep Distance away from the opponent
· Final hit must come from a Low Blow
or Low Blast Brutality 2: Heavy Artillery
,· Only in Full Auto Variation
· Must hit the opponent with 3 Up Rockets during the match
· Final hit must come from a Hand Cannon,
· Must hit the opponent with 3 Up Rockets
during the match· Final hit must come from a Hand Cannon
,Brutality 3: Aftershock
(Air)
· Only in High Tech Variation
· Jacqui must have Gauntlet Spark or Gauntlet Ignite active during the final hit
· Final hit must come from an Air Ground Smash (Air) or Air Ground Tremor (Air)
· Jacqui must have Gauntlet Spark
or Gauntlet Ignite active during the final hit· Final hit must come from an Air Ground Smash (Air)
or Air Ground Tremor (Air) Brutality 4: Gun Show
· Available in all Variations
· Player must Hold during the final hit
· Final hit must come from a Gauntlet Flurry
· Player must Hold
during the final hit· Final hit must come from a Gauntlet Flurry
Brutality 5: Mind Blown
· Available in all Variations
· Player must press during the final hit
· Final hit must come from a Bionic Blast
· Player must press
during the final hit· Final hit must come from a Bionic Blast
Brutality 6: Hidden Brutality
· Available in all Variations
· Player must hold during final hit
· Final hit must come from Chest Kavity
· Player must hold
during final hit· Final hit must come from Chest Kavity
Jax
Fatality 1: T-Wrecks (Close)
Fatality 2: Jax The Ribber (Close)
Klassic Fatality: Arm Rip (Close)
Stage Fatality (Close)
Brutality 1: Rocket Roll
· Only in Heavy Weapons Variation
· Opponent must be in the air
· Final hit must come from L.A.W. Blast
· Opponent must be in the air
· Final hit must come from L.A.W. Blast
Brutality 2: Ground Breaking
· Only in Pumped Up Variation
· Jax must connect 3 Ground Pounds during the match
· Player must hold during Ground Shake
· Final hit must come from a Ground Shake
· Jax must connect 3 Ground Pounds during the match
· Player must hold
during Ground Shake· Final hit must come from a Ground Shake
Brutality 3: Ragdoll
· Only in Wrestler Variation
· Must perform entire Quad Grapple Chain,,,,
· Final hit must come from Quad Grapple Chain,,,,
· Must perform entire Quad Grapple Chain
,,,,· Final hit must come from Quad Grapple Chain
,,,,Brutality 4: Gotcha Down
· Available in all Variations
· Player must hold during Gotcha Grab
· Final hit must come from Gotcha Grab
· Player must hold
during Gotcha Grab· Final hit must come from Gotcha Grab
Brutality 5: Sledge Hammer
· Available in all Variations
· Opponent must be ducking during final hit
· Final hit must come from a Downward Dash Punch or a Downward Dash Fist
· Opponent must be ducking during final hit
· Final hit must come from a Downward Dash Punch
or a Downward Dash Fist Johnny Cage
Fatality 1: Here’s Johnny (Close)
Fatality 2: Little Improv (Mid)
Klassic Fatality: Decap (Close)
Stage Fatality (Close)
Brutality 1: Wow Out
,,· Only in Fisticuffs Variation
· The opponent must be blocking during the final hit
· Final hit must come from the Speed Bag kombo,,
· The opponent must be blocking during the final hit
· Final hit must come from the Speed Bag kombo
,,Brutality 2: Fall Guy
· Only in Stunt Double Variation
· Johnny must have Mimic active during final hit
· Must hold during final hit
· Final hit must come from a Shadow Kick
· Johnny must have Mimic active during final hit
· Must hold
during final hit· Final hit must come from a Shadow Kick
Brutality 3: Bring It On
· Only in A-List Variation
· Johnny must have less than 5% health remaining and have Red Shadow active
· Johnny must have Rising Kick charged
· Final hit must come from a Rising Kick
· Johnny must have less than 5% health remaining and have Red Shadow active
· Johnny must have Rising Kick charged
· Final hit must come from a Rising Kick
Brutality 4: Blood Spurt
,,· Available in all Variations
· Johnny and opponent must be facing the camera
· Final hit must come from the Take Two kombo,,
· Johnny and opponent must be facing the camera
· Final hit must come from the Take Two kombo
,,Brutality 5: Eye Popping
· Available in all Variations
· Johnny must connect 4 Nut Punches during the match
· Final hit must come from a Nut Punch or Nutcracker
· Johnny must connect 4 Nut Punches
during the match· Final hit must come from a Nut Punch
or Nutcracker Brutality 6: Heads Will Roll
· Available in all Variations
· Johnny must connect 5 Nut Punches during the match
· Final hit must come from a Nutcracker
· Johnny must connect 5 Nut Punches during the match
· Final hit must come from a Nutcracker
Kano
Fatality 1: Head Case (Close)
Fatality 2: Knife to Meet You (Far)
Stage Fatality (Close)
Brutality 1: Just The Tip
· Only in Cutthroat Variation
· Final hit must come from a Bloody Slice
· Final hit must come from a Bloody Slice
Brutality 2: Glaring Light
,· Only in Cybernetic Variation
· Kano must perform a 5 hit kombo that ends with an Enhanced Upward Laser,
· Final hit must come from an Enhanced Upward Laser,
· Kano must perform a 5 hit kombo that ends with an Enhanced Upward Laser
,· Final hit must come from an Enhanced Upward Laser
,Brutality 3: Wham Bam
· Only in Commando Variation
· Player must press during final hit
· Final hit must come from Power Slam or Power Bomb
· Player must press
during final hit· Final hit must come from Power Slam
or Power Bomb Brutality 4: Terminate
or · Available in all Variations
· Connect 3 throws or during the match
· Hold during final throw or
· Final hit must come from a throw or
· Connect 3 throws
or during the match· Hold
during final throw or · Final hit must come from a throw
or Brutality 5: Ballin'
(Air) ,
,· Available in all Variations
· Opponent must be blocking and die from chip damage
· Final hit must come from an Air Ball (Air),
· Opponent must be blocking and die from chip damage
· Final hit must come from an Air Ball (Air)
,Brutality 6: Pop Off
· Only in Commando Variation
· Player must press or 15 times during final hit
· Final hit must come from a Choke
· Player must press
or 15 times during final hit· Final hit must come from a Choke
Kenshi
Fatality 1: Tele-Copter (Far)
Fatality 2: My Puppet (Far)
Stage Fatality (Close)
Brutality 1: Leg Up
· Only in Balanced Variation
· Must get first hit of the match
· Final hit must come from a Tele-Flurry
· Must get first hit of the match
· Final hit must come from a Tele-Flurry
Brutality 2: Demon Slice
· Only in Possessed Variation
· Player must Hold during final hit
· Final hit must come from a Sickle Lift or Sickle Strike
· Player must Hold
during final hit· Final hit must come from a Sickle Lift
or Sickle Strike Brutality 3: Instant Karma
· Only in Kenjutsu Variation
· Kenshi must connect 5 Tele-Pushes during the match
· Must be Jump Distance away from the opponent
· Final hit must come from a Tele-Push or Tele-Blast
· Kenshi must connect 5 Tele-Pushes
during the match· Must be Jump Distance away from the opponent
· Final hit must come from a Tele-Push
or Tele-Blast Brutality 4: Brutal Kick
,,· Available in all Variations
· Must go 5 seconds without being hit during the final round
· Final hit must come from the Concentration kombo,,
· Must go 5 seconds without being hit during the final round
· Final hit must come from the Concentration kombo
,,Brutality 5: Used Up
or · Available in all Variations
· Kenshi must win the first round with a throw or
· Final hit of the match must come from a throw or
· Kenshi must win the first round with a throw
or · Final hit of the match must come from a throw
or Brutality 6: Hidden Brutality
· Only available in Balanced Variation
· Opponent must be Kotal Kahn, Cassie Cage, Reptile, Kung Jin, Predator or Tremor
· Final hit must come from Blade Reflecting a Brutality projectile
· Opponent must be Kotal Kahn, Cassie Cage, Reptile, Kung Jin, Predator or Tremor
· Final hit must come from Blade Reflecting a Brutality projectile
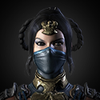
Kitana
Fatality 1: Dark Fan-Tasy (Mid)
Fatality 2: Splitting Hairs (Mid)
Klassic Fatality: Decapitation (Close)
Stage Fatality (Close)
Brutality 1: Back That Up
(Air)
· Only in Royal Storm Variation
· Kitana must perform 1 reflect move during the match with Bounce Back
· Final hit must come from an Air Square Boost (Air) or Air Square Wave (Air)
· Kitana must perform 1 reflect move during the match with Bounce Back
· Final hit must come from an Air Square Boost (Air)
or Air Square Wave (Air) Brutality 2: Lost Girl
· Only in Assassin Variation
· Must have Sharpen active or Razor Blade active
· Final hit must come from an Assassin Strike or Assassin Impale
· Must have Sharpen active
or Razor Blade active · Final hit must come from an Assassin Strike
or Assassin Impale Brutality 3: All Is On
· Only in Mournful Variation
· Guide Glaive to the opponent's head hold after Glaive Throw
· Final hit must come from a Glaive Throw
· Guide Glaive to the opponent's head hold
after Glaive Throw· Final hit must come from a Glaive Throw
Brutality 4: Biggest Fan
· Available in all Variations
· Kitana must connect 3 Rising Fans during the match
· Final hit must come from Rising Blades
· Kitana must connect 3 Rising Fans
during the match· Final hit must come from Rising Blades
Brutality 5: Off The Top
· Available in all Variations
· Player must hold during final hit
· Final hit must come from a Throat Slice or Throat Slash
· Player must hold
during final hit· Final hit must come from a Throat Slice
or Throat Slash Brutality 6: Hidden Brutality
· Only available in Royal Storm Variation
· Opponent must be Kotal Kahn, Cassie Cage, Reptile, Kung Jin, Predator or Tremor
· Final hit must come from Bouncing Back a Brutality projectile
· Opponent must be Kotal Kahn, Cassie Cage, Reptile, Kung Jin, Predator or Tremor
· Final hit must come from Bouncing Back a Brutality projectile
Kotal Kahn
Fatality 1: Be Mine! (Close)
Fatality 2: Tight Squeeze (Close)
Stage Fatality (Close)
Brutality 1: Totem This
· Only in Blood God Variation
· Kotal must summon each of his Totems once
· Kotal must have Crystal Totem active
· There must be 30 seconds or less remaining
· Final hit must come from 2 Fist Uppercut
· Kotal must summon each of his Totems once
· Kotal must have Crystal Totem active
· There must be 30 seconds or less remaining
· Final hit must come from 2 Fist Uppercut
Brutality 2: Sawed Off
· Only in War God Variation
· Final hit must come from a 3 hit kombo that ends with Saw Blade
· Final hit must come from a 3 hit kombo that ends with Saw Blade
Brutality 3: Dry Rub
· Only in Sun God Variation
· Kotal must have level 3 of Sun God Choke or Moon God Choke
· Final hit must come from Sun God Choke or Moon God Choke
· Kotal must have level 3 of Sun God Choke or Moon God Choke
· Final hit must come from Sun God Choke
or Moon God Choke Brutality 4: Stick Around
· Available in all Variations
· Kotal must hit the opponent with 5 Sunstones during the match
· Must be Jump Distance away from the opponent
· Final hit must come from a Sunstone
· Kotal must hit the opponent with 5 Sunstones
during the match· Must be Jump Distance away from the opponent
· Final hit must come from a Sunstone
Brutality 5: Kotally Awesome
· Available in all Variations
· Must be Sweep Distance away from the opponent
· Final hit must come from God Ray or Sunlight
· Must be Sweep Distance away from the opponent
· Final hit must come from God Ray
or Sunlight Brutality 6: Offering
· Available in all Variations
· Kotal's opponent must have over 50% health remaining
· Sacrifice YOURSELF with a Blood Offering to end the round
· Final hit must come from Blood Offering
· Kotal's opponent must have over 50% health remaining
· Sacrifice YOURSELF with a Blood Offering
to end the round· Final hit must come from Blood Offering
Kung Jin
Fatality 1: Target Practice (Close)
Fatality 2: Pinned Down (Mid)
Stage Fatality (Close)
Brutality 1: Bullseye
(Air)
· Only in Ancestral Variation
· Kung Jin must use every Quiver type at least once during the match
· Must be Sweep Distance away from the opponent
· The Final hit must hit the opponent in the head
· Final hit must come from an Air Down Arrow (Air)
· Kung Jin must use every Quiver type at least once during the match
· Must be Sweep Distance away from the opponent
· The Final hit must hit the opponent in the head
· Final hit must come from an Air Down Arrow (Air)
Brutality 2: Burnt Out
· Only in Bojutsu Variation
· The opponent must be in the air during the final hit
· Final hit must come from a Bo Flame
· The opponent must be in the air during the final hit
· Final hit must come from a Bo Flame
Brutality 3: Decapitator
· Only in Shaolin Variation
· Guide Chakram to the opponent's head hold after Chakram throw
· Guide Chakram to the opponent's shins hold after Chakram throw
· Final hit must come from a Chakram
· Guide Chakram to the opponent's head hold
after Chakram throw· Guide Chakram to the opponent's shins hold
after Chakram throw· Final hit must come from a Chakram
Brutality 4: Round About
· Available in all Variations
· Perform 3 Cartwheel Drops during the match
· Final hit must come from a Cartwheel Smash
· Perform 3 Cartwheel Drops
during the match· Final hit must come from a Cartwheel Smash
Brutality 5: A Little Heart
· Available in all Variations
· Must go 7 seconds without being hit during the final round
· Must be Sweep Distance away from the opponent
· Final hit must come from a Straight Arrow
· Must go 7 seconds without being hit during the final round
· Must be Sweep Distance away from the opponent
· Final hit must come from a Straight Arrow
Brutality 6: Where'd You Go
or · Available in all Variations
· Must use 3 Level Interactions
· Final hit must come from a throw or
· Must use 3 Level Interactions
· Final hit must come from a throw
or Kung Lao
Fatality 1: Face Grind (Close)
Fatality 2: Flower Pot (Close)
Klassic Fatality: Hat Split (Close)
Stage Fatality (Close)
Brutality 1: Spin Cycle
· Only in Tempest Variation
· Kung Lao must have over 50% health remaining
· Final hit must come from a Cyclone
· Kung Lao must have over 50% health remaining
· Final hit must come from a Cyclone
Brutality 2: Grind Away
· Only in Buzz Saw Variation
· Must be Jump Distance away from the opponent
· Final hit must come from a Upward Buzz Saw
· Must be Jump Distance away from the opponent
· Final hit must come from a Upward Buzz Saw
Brutality 3: Z Hat
· Only in Hat Trick Variation
· Kung Lao must set a Hat Trap or Away Hat Trap
· Final hit must come from a Hat Call Back or Heavy Call Back
· Kung Lao must set a Hat Trap
or Away Hat Trap · Final hit must come from a Hat Call Back
or Heavy Call Back Brutality 4: Klassic Toss
· Available in all Variations
· Must be Jump Distance away from the opponent
· Guide hat to the opponent's waist hold or neck hold after Hat Toss
· Final hit must come from a Hat Toss
· For Buzz Saw Variation hold during final Hit
· Must be Jump Distance away from the opponent
· Guide hat to the opponent's waist hold
or neck hold after Hat Toss· Final hit must come from a Hat Toss
· For Buzz Saw Variation hold
during final HitBrutality 5: Open Wide
or · Available in all Variations
· Player must press or 15 times during throw
· Final hit must come from a throw or
· Player must press
or 15 times during throw· Final hit must come from a throw
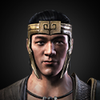
or Liu Kang
Fatality 1: Sore Throat (Close)
Fatality 2: Splitter (Close)
Stage Fatality (Close)
Brutality 1: Dragon's Den
· Available in all Variations
· Liu Kang must connect 3 Dragon's Roar during the match
· Final hit must come from a Dragon's Wrath
· Liu Kang must connect 3 Dragon's Roar during the match
· Final hit must come from a Dragon's Wrath
Brutality 2: Tread Lightly
,· Only in Dragon's Fire Variation
· Final hit must come from an Enhanced Bicycle Kick, or Enhanced Bicycle Flurry ,
· Final hit must come from an Enhanced Bicycle Kick
, or Enhanced Bicycle Flurry ,Brutality 3: Hot Mess
· Only in Dualist Variation
· Liu Kang must perform at least 10 Solar Flares during the match
· Final hit must come from a Solar Blast
· Liu Kang must perform at least 10 Solar Flares
during the match· Final hit must come from a Solar Blast
Brutality 4: Kounter Top
,· Only in Flame Fist Variation
· Player must hold during the final hit
· Final hit must come from an Enhanced Dragon Parry,
· Player must hold
during the final hit· Final hit must come from an Enhanced Dragon Parry
,Brutality 5: Hot Head
(Air)
· Available in all Variations
· Final hit must hit the opponent in the head
· Final hit must come from an Air projectile
· Final hit must hit the opponent in the head
· Final hit must come from an Air projectile
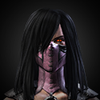
Mileena
Fatality 1: Face Feast (Close)
Fatality 2: Tasty Treat (Close)
Klassic Fatality: Man-Eater (Close)
Stage Fatality (Close)
Brutality 1: Impaler
,,· Only in Piercing Variation
· Player must press on and 5 times during final hit
· Final hit must come from the Sadistic Ways kombo,,
· Player must press on
and 5 times during final hit· Final hit must come from the Sadistic Ways kombo
,,Brutality 2: Fun Ride
,,· Only in Ethereal Variation
· Perform 10 Fade Aways during the match
· Final hit must come from Rider kombo,,
· Perform 10 Fade Aways
during the match· Final hit must come from Rider kombo
,,Brutality 3: Early Lunch
,,,· Only in Ravenous Variation
· Player must Hold during final kombo
· Final hit must come from the Quick Taste kombo,, press and Hold
· Player must Hold
during final kombo· Final hit must come from the Quick Taste kombo
,, press and Hold Brutality 4: Tele-Splat
· Available in all Variations
· Player must Hold during final hit
· Final hit must come from a Tele-Kick or Tele-Drop
· Player must Hold
during final hit· Final hit must come from a Tele-Kick
or Tele-Drop Brutality 5: High Roller
· Available in all Variations
· Mileena must connect 5 Ball Roll attacks during the match
· Player must hold during final hit
· The Final hit must come from a Ball Roll or the second hit of Flip 'n' Roll
· Mileena must connect 5 Ball Roll attacks during the match
· Player must hold
during final hit· The Final hit must come from a Ball Roll
or the second hit of Flip 'n' Roll Brutality 6: Hidden Brutality
,, and hold · Only available in Ravenous Variation
· Player must press and hold for the second half of the Low Pounce Kombo
· Final hit must come from the full Low Pounce Kombo,,
· Player must press
and hold for the second half of the Low Pounce Kombo· Final hit must come from the full Low Pounce Kombo
,,Quan Chi
Fatality 1: Mind Game (Far)
Fatality 2: Both Ends (Close)
Stage Fatality (Close)
Brutality 1: Touch Of Death
· Only in Sorcerer Variation
· The opponent must be standing in the Final Hex spell circle
· The opponent must be blocking during the final hit
· Final hit must come from a Ground Burst
· The opponent must be standing in the Final Hex spell circle
· The opponent must be blocking during the final hit
· Final hit must come from a Ground Burst
Brutality 2: Blood Shower
or · Only in Warlock Variation
· Quan Chi must win the first round with a throw or
· Final hit must come from a throw or
· Quan Chi must win the first round with a throw
or · Final hit must come from a throw
or Brutality 3: Puggles' Wrath
· Only in Summoner Variation
· Must be Jump Distance away from the opponent
· The opponent must have at least 10% health remaining during final hit
· Press more than 4 times during final hit
· Final hit must come from Demon Grab
· Must be Jump Distance away from the opponent
· The opponent must have at least 10% health remaining during final hit
· Press
more than 4 times during final hit· Final hit must come from Demon Grab
Brutality 4: Skull Transplant
· Available in all Variations
· Must be Jump Distance away from the opponent
· Player must hold during final hit
· Final hit must come from Skull
· Must be Jump Distance away from the opponent
· Player must hold
during final hit· Final hit must come from Skull
Brutality 5: Kurb Stomp
· Available in all Variations
· Player must press before the last head slam
· Final hit must come from Sky Crush
· Player must press
before the last head slam· Final hit must come from Sky Crush
Raiden
Fatality 1: Bug Eyes (Close)
Fatality 2: Conducting Rod (Far)
Stage Fatality (Close)
Brutality 1: Overload
,,,· Only in Thunder God Variation
· Perform a combo that does over 30% damage
· Final hit must come from the Lightning Strike kombo,,,
· Perform a combo that does over 30% damage
· Final hit must come from the Lightning Strike kombo
,,,Brutality 2: Inside You
,· Only in Displacer Variation
· Raiden must perform 5 Teleports
· Final hit must come from a ground or air enhanced Electric Fly, or enhanced Thunder Fly ,
· Raiden must perform 5 Teleports
· Final hit must come from a ground or air enhanced Electric Fly
, or enhanced Thunder Fly ,Brutality 3: Power Outage
· Only in Master of Storms Variation
· Must land a 10 hit kombo during the match
· Final hit must come from a Static Trap or Full Trap
· Must land a 10 hit kombo during the match
· Final hit must come from a Static Trap
or Full Trap Brutality 4: Dark Force
,,· Available in all Variations
· During the Power Discharge Kombo player must press during electric zaps
· Final hit must come from the Power Discharge Kombo,,
· During the Power Discharge Kombo player must press
during electric zaps· Final hit must come from the Power Discharge Kombo
,,Brutality 5: Super Shocker
· Available in all Variations
· Raiden must press 3 times During the Electrocute
· Final hit must come Electrocute
· Raiden must press
3 times During the Electrocute· Final hit must come Electrocute
Reptile
Fatality 1: Bad Breath (Close)
Fatality 2: Acid Bath (Close)
Stage Fatality (Close)
Brutality 1: Puke
,· Only in Deceptive Variation
· Perform 2 Acid Puddles during the match
· Final hit must come from the Slithering Slam Kombo, or Swamp Slam Kombo ,,
· Perform 2 Acid Puddles
during the match· Final hit must come from the Slithering Slam Kombo
, or Swamp Slam Kombo ,,Brutality 2: Knee Kapper
· Only in Nimble Variation
· Reptile must have Basilisk or Basilisk Runner active during final hit
· Final hit must come from a Slippery Slide
· Reptile must have Basilisk
or Basilisk Runner active during final hit· Final hit must come from a Slippery Slide
Brutality 3: Bo Dash
· Only in Noxious Variation
· Reptile must have Poison Gas active during final hit
· Final hit must come from a Reptilian Smash
· Reptile must have Poison Gas
active during final hit· Final hit must come from a Reptilian Smash
Brutality 4: Heart Attack
· Available in all Variations
· Reptile must connect 3 Tongue Slaps during the match
· Final hit must come from a Tongue Slap
· Reptile must connect 3 Tongue Slaps
during the match· Final hit must come from a Tongue Slap
Brutality 5: Acid Wash
· Available in all Variations
· Reptile must do more than 25% damage with Acid Spit during the match
· Final hit must come from Acid Spit
· Reptile must do more than 25% damage with Acid Spit
during the match· Final hit must come from Acid Spit
Brutality 6: Bubble Head
· Available in all Variations
· Reptile must do more than 30% damage with Acid Spit during the match
· Hold during Bubble Head Squence
· Final hit must come from Acid Spit
· Reptile must do more than 30% damage with Acid Spit
during the match· Hold
during Bubble Head Squence· Final hit must come from Acid Spit
Scorpion
Fatality 1: Stop Ahead (Mid)
Fatality 2: Who’s Next! (Mid)
Klassic Fatality: Toasty (Mid)
Stage Fatality (Close)
Brutality 1: Just A Scratch
· Only in Ninjutsu Variation
· Connect 3 Downfalls during the match
· Final hit must be Doom Blade
· Connect 3 Downfalls during the match
· Final hit must be Doom Blade
Brutality 2: Nether Hole
· Only in Hellfire Variation
· Scorpion must have Flame Aura active
· Must be Full Screen distance away from opponent
· Final hit must be from Fire Ball or Hell Ball
· Scorpion must have Flame Aura active
· Must be Full Screen distance away from opponent
· Final hit must be from Fire Ball
or Hell Ball Brutality 3: Little Devil
· Only in Inferno Variation
· Scorpion must connect Minion Charge Minion Drop and Minion Grab at least once
· Final hit must be from Minion Grab or Minion Hold
· Scorpion must connect Minion Charge
Minion Drop and Minion Grab at least once· Final hit must be from Minion Grab
or Minion Hold Brutality 4: Shirai Ryu Fire
(Air)
· Available in all Variations
· Final hit must be from Air Flameport (Air)
· Final hit must be from Air Flameport (Air)
Brutality 5: Get Over Here
,· Available in all Variations
· Scorpion must have over 50% health remaining
· Final hit must be enhanced Double Spear,
· Scorpion must have over 50% health remaining
· Final hit must be enhanced Double Spear
,Shinnok
Fatality 1: The Grinder (Mid)
Fatality 2: Flick Trick (Mid)
Stage Fatality (Close)
Brutality 1: Face Off
· Only in Impostor Variation
· Must be Jump Distance away from the opponent
· Shinnok must lose 1 round
· Final hit must come from Mimicry
· Must be Jump Distance away from the opponent
· Shinnok must lose 1 round
· Final hit must come from Mimicry
Brutality 2: Have A Nice Day
,,· Only in Bone Shaper Variation
· Must have 1 bar of Super meter at the end of the match
· Final hit must come from Deity kombo,,
· Must have 1 bar of Super meter at the end of the match
· Final hit must come from Deity kombo
,,Brutality 3: Hands Down
· Only in Necromancer Variation
· Must be Sweep distance away from opponent
· Player must Hold during final hit
· Final hit must come from Judgment Fist or Judgment Smash
· Must be Sweep distance away from opponent
· Player must Hold
during final hit· Final hit must come from Judgment Fist
or Judgment Smash Brutality 4: Skull Bash
or · Available in all Variations
· Must win first round with a throw
· Final hit must come from a throw or
· Must win first round with a throw
· Final hit must come from a throw
or Brutality 5: Gory Hole
· Available in all Variations
· Player must Hold during final hit
· Final hit must come from Amulet Strike
· Player must Hold
during final hit· Final hit must come from Amulet Strike
Brutality 6: Hidden Brutality
· Only available in Imposter Variation
· Opponent must be Sub-Zero, Ermac, Kung Jin, Mileena, Sonya Blade, Jax or D'Vorah
· Final hit must come from Mimicry
· Opponent must be Sub-Zero, Ermac, Kung Jin, Mileena, Sonya Blade, Jax or D'Vorah
· Final hit must come from Mimicry
Sonya
Fatality 1: Target Marked (Close)
Fatality 2: Head Hunter (Mid)
Klassic Fatality: Kiss of Death (Mid)
Stage Fatality (Close)
Brutality 1: Garro-That
· Only in Covert Ops Variation
· Connect a 10 hit kombo during the match
· Final hit must come from a Garrote Punish, or
· Connect a 10 hit kombo during the match
· Final hit must come from a Garrote Punish
, or Brutality 2: Time Bomb
,,· Only in Demolition Variation
· Lose 1 round
· Final hit must come from Boomer kombo,,
· Lose 1 round
· Final hit must come from Boomer kombo
,,Brutality 3: Kamikaze
,· Only in Special Forces Variation
· The opponent must be blocking during the final hit
· Final hit must come from a Drone Kamikaze,
· The opponent must be blocking during the final hit
· Final hit must come from a Drone Kamikaze
,Brutality 4: Boot To Head
· Available in all Variations
· Sonya must have over 50% health remaining
· Final hit must come from Wrap Around
· Sonya must have over 50% health remaining
· Final hit must come from Wrap Around
Brutality 5: Thigh Master
· Available in all Variations
· Sonya must have less than 50% health remaining
· Must perform a 5 hit kombo that ends with a Leg Grab or Leg Slam
· Final hit must come from a Leg Grab or Leg Slam
· Sonya must have less than 50% health remaining
· Must perform a 5 hit kombo that ends with a Leg Grab or Leg Slam
· Final hit must come from a Leg Grab
or Leg Slam Brutality 6: Hidden Brutality
· Available in all Variations
· Player must be holding during final hit
· Final hit must come from Special Forces
· Player must be holding
during final hit· Final hit must come from Special Forces
Sub-Zero
Fatality 1: Chest Kold (Close)
Fatality 2: Bed of Ice (Close)
Klassic Fatality: Head Rip (Close)
Stage Fatality (Close)
Brutality 1: Pick Your Brain
,,· Only in Cryomancer Variation
· Sub-Zero must perform a 6 hit kombo that ends with the Cold Blooded kombo,,
· Final hit must come from the Cold Blooded kombo,,
· Sub-Zero must perform a 6 hit kombo that ends with the Cold Blooded kombo
,,· Final hit must come from the Cold Blooded kombo
,,Brutality 2: Ice Cubed
· Only in Unbreakable Variation
· Must have Frozen Aura active during final hit
· Final hit must come from the Icy Slide
· Must have Frozen Aura active during final hit
· Final hit must come from the Icy Slide
Brutality 3: Splitting Image
· Only in Grandmaster Variation
· Create Klone or Ice Statue
· Explode Klone with Ice Burst or Frost Bomb
· Player must hold during final hit
· Final hit must come from exploding the Ice Klone
· Create Klone
or Ice Statue · Explode Klone with Ice Burst
or Frost Bomb · Player must hold
during final hit· Final hit must come from exploding the Ice Klone
Brutality 4: Frozen Dinner
· Available in all Variations
· Sub-Zero must freeze the opponent with an Ice Ball and perform Rising Fist or Upward Sword to the frozen opponent
· Final hit must come from Rising Fist or Upward Sword
· Sub-Zero must freeze the opponent with an Ice Ball
and perform Rising Fist or Upward Sword to the frozen opponent· Final hit must come from Rising Fist
or Upward Sword Brutality 5: Snow Ball
· Available in all Variations
· There must be more than 40 seconds remaining
· Must be Full Screen distance away from opponent
· Opponent must be frozen and final hit must come from an Ice Blast
· There must be more than 40 seconds remaining
· Must be Full Screen distance away from opponent
· Opponent must be frozen and final hit must come from an Ice Blast
Takeda
Fatality 1: Whip It Good (Mid)
Fatality 2: Head Cage (Mid)
Stage Fatality (Close)
Brutality 1: Whip It Out
· Only in Shirai Ryu Variation
· Takeda must have over 50% health remaining
· Final hit must come from a Shirai Ryu Phase
· Takeda must have over 50% health remaining
· Final hit must come from a Shirai Ryu Phase
Brutality 2: Two-Sided
· Only in Lasher Variation
· Player must press during final hit
· Final hit must come from a Whip Flurry
· Player must press
during final hit· Final hit must come from a Whip Flurry
Brutality 3: Force Slice
· Only in Ronin Variation
· Must Perform a Blade Drop and keep the Blade on the ground until the final hit
· Final hit must come from a Blade Kall or Blade Summon
· Must Perform a Blade Drop
and keep the Blade on the ground until the final hit· Final hit must come from a Blade Kall
or Blade Summon Brutality 4: Kool Whip
,,· Available in all Variations
· Final hit must come the Quick Learner kombo or Low Swipe Kombo,,
· Final hit must come the Quick Learner kombo or Low Swipe Kombo
,,Brutality 5: Armless
or · Available in all Variations
· Player must press or 4 times during final hit
· Final hit must come from a throw or
· Player must press
or 4 times during final hit· Final hit must come from a throw
or DLC Characters
Goro
Fatality 1: Peek-A-Boo (Close)
Fatality 2: Shokan Amputation (Close)
Stage Fatality (Close)
Brutality 1: Chest Bump
· Only in Kuatan Warrior Variation
· Must do 5 forwards dashes during the match
· Goro must have over 50% health remaining at the end of the match
· Final hit must come from a Chest Lunge or Chest Charge
· Must do 5 forwards dashes during the match
· Goro must have over 50% health remaining at the end of the match
· Final hit must come from a Chest Lunge
or Chest Charge Brutality 2: Tail Spin
· Only in Dragon Fangs Variation
· Only the third hit of the final attack must connect
· Final hit must come from a Dragon Spin
· Only the third hit of the final attack must connect
· Final hit must come from a Dragon Spin
Brutality 3: Shokan Flame
· Only in Tigrar Fury Variation
· Goro must be close to the opponent during the final hit
· Player must hold during the final hit
· Final hit must come from a Dragon Torch
· Goro must be close to the opponent during the final hit
· Player must hold
during the final hit· Final hit must come from a Dragon Torch
Brutality 4: Speed Bag
· Available in all Variations
· Goro must win the match in 2 rounds
· Player must hold during final hit
· Final hit must come from a Shokan Grab or Shokan Slam
· Goro must win the match in 2 rounds
· Player must hold
during final hit· Final hit must come from a Shokan Grab
or Shokan Slam Brutality 5: Krush
· Available in all Variations
· The opponent must be blocking during the final hit
· Final hit must come from a Krush
· The opponent must be blocking during the final hit
· Final hit must come from a Krush
Jason
Fatality 1: Kill for Mother (Mid)
Fatality 2: Sleeping Bag Killer (Mid)
Stage Fatality (Close)
Brutality 1: Blood Bath
· Only in Slasher Variation
· Player must Hold during final hit
· Final hit must come from Bloodlust
· Player must Hold
during final hit· Final hit must come from Bloodlust
Brutality 2: Head Spin
· Only in Relentless Variation
· Must have Pursuit active during final hit
· Final hit must come from Crippler
· Must have Pursuit
active during final hit· Final hit must come from Crippler
Brutality 3: Spinal Tap
· Only in Unstoppable Variation
· Jason needs to be resurrected in the final round
· Final hit must come from Back Breaker
· Jason needs to be resurrected in the final round
· Final hit must come from Back Breaker
Brutality 4: Go to Hell
· Available in all Variations
· Jason must walk towards his opponent for a few steps before connecting the final hit
· Final hit must come from The Horror
· Jason must walk towards his opponent for a few steps before connecting the final hit
· Final hit must come from The Horror
Brutality 5: Blunt Trauma
· Available in all Variations
· Must win both rounds
· Final hit must come from Shoulder Charge or Temple Slam
· Must win both rounds
· Final hit must come from Shoulder Charge
or Temple Slam Tanya
Fatality 1: Bloody Boots (Close)
Fatality 2: Edenian Drill (Close)
Stage Fatality (Close)
Brutality 1: Backstabbed
· Only in Kobu Jutsu Variation
· Must be Jump Distance away from the opponent
· Final hit of the match must come from a Tonfa Throw
· Must be Jump Distance away from the opponent
· Final hit of the match must come from a Tonfa Throw
Brutality 2: Watch This
(Air) ,
,· Only in Dragon Naginata Variation
· Player must hold during final hit
· Player must be in Staff Stance (Air)
· Final hit must come from a Swing Kick
· Player must hold
during final hit· Player must be in Staff Stance (Air)
· Final hit must come from a Swing Kick
Brutality 3: Pop Pop
· Only in Pyromancer Variation
· Opponent must be covered in the Dark Shroud
· Final hit must come from a Surging Blast
· Opponent must be covered in the Dark Shroud
· Final hit must come from a Surging Blast
Brutality 4: Romp Stomp
· Available in all Variations
· Player must hold during final hit
· Final hit of the match must come from a Split Flip Kick
· Player must hold
during final hit· Final hit of the match must come from a Split Flip Kick
Brutality 5: Top Off
or · Available in all Variations
· Player must hold during final hit
· Final hit of the match must come from a throw or
· Player must hold
during final hit· Final hit of the match must come from a throw
or Predator
Fatality 1: Ghostin' Us (Close)
Fatality 2: Certain Death (Mid)
Stage Fatality (Close)
Brutality 1: Final Kountdown
· Only in Warrior Variation
· Final hit must come from Self-Detonate or Self-Destruct
· Final hit must come from Self-Detonate
or Self-Destruct Brutality 2: Skinned Alive
· Only in Hunter Variation
· Final hit must come from Snag or Trap
· Final hit must come from Snag
or Trap Brutality 3: If It Bleeds
· Only in Hish-Qu-Ten Variation
· Final hit must come from Plasma Shot
· Final hit must come from Plasma Shot
Brutality 4: Time To Bleed
or · Available in all Variations
· Player must Hold during final hit
· Final hit must come from a throw or
· Player must Hold
during final hit· Final hit must come from a throw
or Brutality 5: Anytime
· Available in all Variations
· Player must Hold when triggering final hit
· Final hit must come from What The Hell
· Player must Hold
when triggering final hit· Final hit must come from What The Hell
Brutality 6: Hidden Brutality
,,· Available in all Variations
· Player must hold during final hit
· Final hit must come from Ugly Mother...,,
· Player must hold
during final hit· Final hit must come from Ugly Mother...
,,Tremor
Fatality 1: Stone Tomb (Mid)
Fatality 2: Stalag-Might (Mid)
Stage Fatality (Close)
Brutality 1: Rock Head
· Only in Aftershock Variation
· Must be Jump Distance away from the opponent
· Final hit must come from Rock Toss or Boulder Throw
· Must be Jump Distance away from the opponent
· Final hit must come from Rock Toss
or Boulder Throw Brutality 2: It's Me Tremor
· Only in Metallic Variation
· Must be Jump Distance away from the opponent
· Must have Gold Skin active
· Final hit must come from Gold Punch or Gold Launch
· Must be Jump Distance away from the opponent
· Must have Gold Skin active
· Final hit must come from Gold Punch
or Gold Launch Brutality 3: Krystal Khaos
,
· Only in Crystalline Variation
· Tremor must perform Summon Krystal in the final round
· Final hit must come throwing the summoned Krystal
· Tremor must perform Summon Krystal
in the final round· Final hit must come throwing the summoned Krystal
Brutality 4: Rumble Trouble
· Available in all Variations
· Tremor must connect all 3 hits of the Ground Quake
· Final hit must come from a Ground Quake
· Tremor must connect all 3 hits of the Ground Quake
· Final hit must come from a Ground Quake
Brutality 5: Blood Rock
· Available in all Variations
· Player must hold during the final hit
· Final hit must come from Rock Bottom
· Player must hold
during the final hit· Final hit must come from Rock Bottom
Brutality 6: Hidden Brutality 1
· Available in all Variations
· Player must perform Rolling Stone 3 times during the match
· Final hit must come from Rolling Stone
· Player must perform Rolling Stone 3 times during the match
· Final hit must come from Rolling Stone
Brutality 7: Hidden Brutality 2
· Available in all Variations
· Player must hold during final hit
· Final hit must come from Throw
· Player must hold
during final hit· Final hit must come from Throw
Brutality 8: Hidden Brutality 3
· Only Available in Metallic Variation
· Must have Lava Skin active
· Final hit must come from Lava Drop
· Must have Lava Skin active
· Final hit must come from Lava Drop
Brutality 9: Hidden Brutality 4
· Available in all Variations
· Player must perform Rock Slam 4 times during the match
· Final hit must come from Rock Slam
· Player must perform Rock Slam 4 times during the match
· Final hit must come from Rock Slam
Brutality 10: Hidden Brutality 5
,,· Available in all Variations
· Player must be holding during final hit
· Final hit must come from Shock Wave,,
· Player must be holding
during final hit· Final hit must come from Shock Wave
,,Bo' Rai Cho
Fatality 1: Booze You Lose (Close)
Fatality 2: Bottoms Up (Close)
Stage Fatality (Close)
Triborg
Fatality 1: Team Work (Mid)
Fatality 2: Death Machine (Far)
Stage Fatality (Close)
Alien
Fatality 1: Killer Queen (Close)
Fatality 2: Deadly Hybrid (Mid)
Stage Fatality (Close)
Leatherface
Fatality 1: Seeing Double (Close)
Fatality 2: Hook and Sinker (Close)
Stage Fatality (Close)
Follow @MKWarehouse
© 2002-2025 Mortal Kombat Warehouse - All rights reserved.
Mortal Kombat®, the Dragon Logo, and all character names are trademarks of Warner Bros. Entertainment Inc.

Contact, Submit Kontent and/or Report Mistakes: @MKWarehouse on Twitter - Email
Mortal Kombat Warehouse is proud to be a part of the Mortal Kombat Online network.
© 2002-2025 Mortal Kombat Warehouse - All rights reserved.
Mortal Kombat®, the Dragon Logo, and all character names are trademarks of Warner Bros. Entertainment Inc.
Contact, Submit Kontent and/or Report Mistakes: @MKWarehouse on Twitter - Email
Mortal Kombat Warehouse is proud to be a part of the Mortal Kombat Online network.